Showing posts with label tutorial. Show all posts

August 28, 2011

weekend project: from dress to skirt

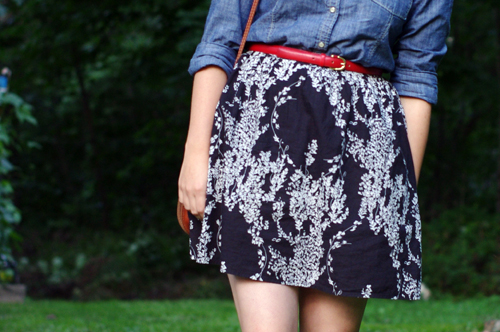
skirtFinished

Whew! My apologies for my recent absence here on the blog, but it's been a crazy few days. On top of working around the clock to try and get my portfolio finished early this week, we took a trip out to Amherst yesterday to help Chris' brother move into a new apartment, and, like many others on the East Coast, spent the last twenty-four hours in full-on hurricane brouhaha. Fortunately we only wound up experiencing a five hour power outage and some really minor flooding in the basement today.

Anyway, here is the dress-to-skirt tutorial I alluded to earlier this week - what better time than a day of rotten weather to finally transform an underutilized dress into a skirt you'll love? While it has been sad to see our travels wind down these last few weeks, one of the things I've most looked forward to about coming back to the US is getting back to making things. I get a lot of questions here about how I've made or altered many of the clothes I wear, and now I'm excited to post a lot more sewing and DIY projects here on the blog. This tutorial is the first installment of a new feature I'm calling 'Weekend Projects' - every week or so, I'll post a tutorial for a new project with step-by-step photos, instructions, and answers to any questions you guys might have in the comments. The type of projects will vary week-to-week, including sewing projects (both constructing new garments and altering existing clothes), jewelry-making, some home improvement/decorating projects (once we have a home of our own, ha!) and probably even a bit of cooking here and there - but will generally be of a scale that can be accomplished in the course of a Sunday afternoon. AND, should any of you try out these tutorials, please send me a photo and/or a link to your blog, as I would love to feature your handiwork here the following week!

So, all that business out of the way, let's get to making a skirt, shall we? You'll need:
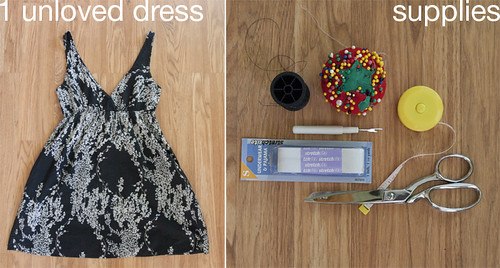
skirtTutorial_step00

An unloved dress with a fairly full skirt; thread that matches your fabric color; lots of pins (including one safety pin); a seam-ripper (or small scissors, good eyes, and a steady hand); a measuring tape or yardstick; 1-1.5" wide elastic, at least long enough to go around your waist; scissors; an iron and ironing board; and a sewing machine (or a hand-sewing needle and an enormous amount of patience).
skirtTutorial_step01

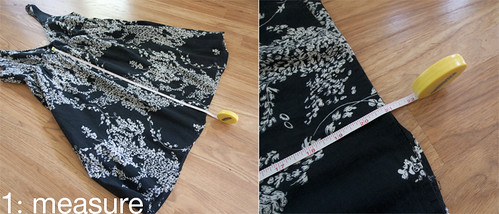
Step 1: Measure another skirt whose length you like to determine how long you want your new finished skirt to be. I decided I wanted my skirt to be 18.5" from the top of the waistband to the hem. Now measure from the bottom of the dress hem to the existing waistband - you'll need it be at least the desired length of your skirt plus the width of your elastic plus another half inch or so. In my case, I needed 18.5" skirt length + 1" elastic + .75", or 20.25", and my dress was 21" from hem to waistband - perfect!
skirtTutorial_step02

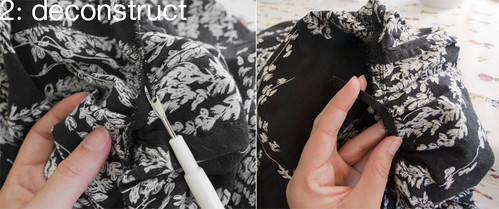
Step 2: Separate the top half of the dress from the bottom/skirt half. If after measuring, you found that the skirt of your existing dress is a great deal longer than what you need, you can just carefully snip along the underside of the existing waistband with scissors to separate the two halves; if, like me, you find that the current length is pretty close to what you'll need for your skirt, pick out the stitches along the existing waistband with your seam ripper. You just want to remove any existing elastic and separate the 'skirt' half from the top half of the dress - be sure not to rip open the side seams, or you'll just need to re-sew them. If your dress doesn't have a waistband per se, you'll need to mark a place to cut it in half with scissors; measure up from the hem and mark your desired length from Step 1 (plus maybe an inch or so, just in case) with pins or chalk, then carefully snip off the top half. Err on the safe side - you can always trim off any extra fabric later, but it's much harder to put back what you've already cut off.
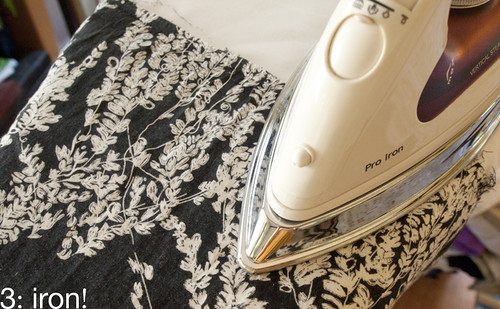
skirtTutorial_step03

Step 3: Once you've separated the two halves of your dress, slip your 'skirt' half onto your ironing board, wrong-side out, and iron it all the way around to get out any wrinkles or gathers from the old waistband. Leave it on the board for the next few steps.
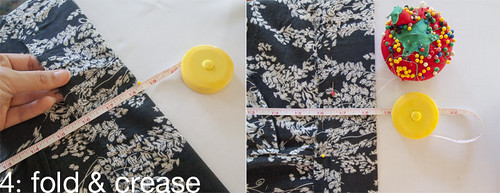
skirtTutorial_step04

Step 4: Now you're going to fold over the top, unfinished edge of your skirt to make your new waistband. Measure straight up from the existing hem and fold over the top edge until you meet your desired length (in my case, 18.5"). Work your way all the way around the top edge, re-checking your measurement every 1.5" or so, and pinning as you go, until the top edge is folded and pinned all the way around at your desired length. Go over the folded edge with your iron (watching out for pins and moving them as needed) to make a nice, firm crease all the way around. We'll call this 'Crease A.'
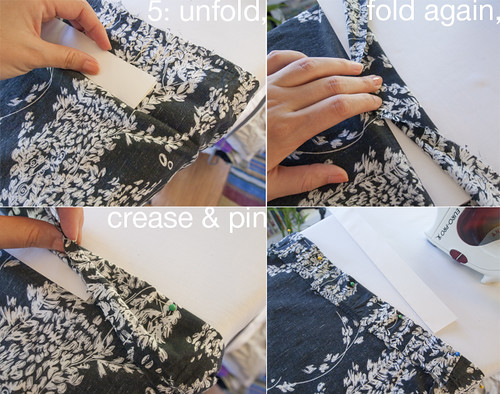
skirtTutorial_step05

Step 5*: Cut a strip of paper or cardstock the width of your elastic plus 1/4" - in my case, I cut a folded sheet of heavy paper to make a strip 1.25" wide. Unpin the folded edge of your skirt, and gently unfold Crease A. Place your paper strip just above the crease line, between the crease and the rough, unfinished edge at the top. Holding your paper guide so that the lower edge is right at Crease A, fold the top edge of the fabric over the guide, so that you create a new fold line ('Crease B') 1.25" above Crease A. Carefully iron the new fold (do your best not to iron over the original crease line, you'll need it again), then remove the paper guide and pin the folded edge. Working your way around the entire circumference of the skirt, repeat this step every few inches, until you have a new pinned crease all the way around.

skirtTutorial_step06

Step 6: Once you've got your second crease ironed in, you can trim off any excess fabric at the top edge. Snip off the rough edge all the way around, about 3/8" - 1/2" from Crease B. Unpin all the way around, and fold the fabric back over at Crease B, then Crease A, and repin it all the way around. You should now have two nice folded edges showing, with the cut edge of the fabric hidden inside. This will become the casing for your new elastic waistband.
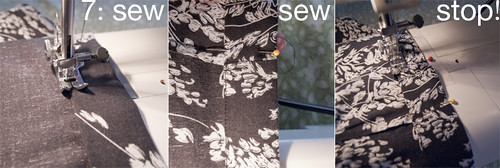
skirtTutorial_step07

Step 7: Now you're going to carefully sew along the edge of Crease B, about 1/8" or less inside the fold. Mark your starting point with a prominent pin and add another pin 2" above the first to mark your stopping point. Sew almost all the way around, stopping at your second pin to leave a 2" gap. Pull your threads through to the 'wrong side' of the skirt fabric and tie off your thread at the beginning and end of your seam. You now have a casing for your elastic running all the way around the top of your skirt.
skirtTutorial_step08

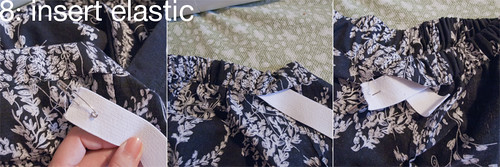
Step 8: Measure your natural waist comfortably with your measuring tape. Without stretching it, cut your elastic to the same measurement - when you sew the two ends together later, you'll get a little stretch, which will help keep the skirt in place while wearing. Put a safety pin through one end of the elastic to help thread it through your waistband. Insert that end into your 2" opening, and start working it through the casing, being careful not to twist the elastic inside the casing. Allow the fabric to bunch up as you go, taking care not to pull in the tail end of the elastic, and eventually you should have both ends of the elastic sticking out of your opening.
skirtTutorial_step09

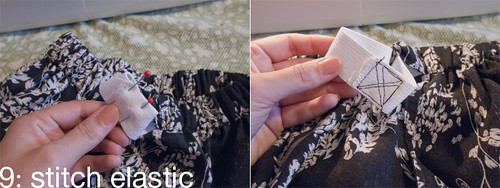
Step 9: Double check that your elastic is smooth and not twisted all the way around your waistband, then overlap the two ends and pin them together. Carefully stitch over the overlapped section a few times to make sure your stitches won't come out when stretched (my machine was skipping stitches like none other, so my elastic looks pretty sloppy here - fortunately none of that will show in the finished product!).
skirtTutorial_step10

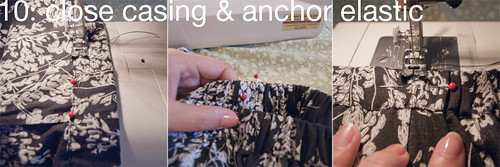
Step 10: Release the stitched-together section of elastic and give the whole waistband a little stretch - this should pull the ends in through the opening in the casing and smooth everything out a bit. Pin the 2" section you left open, and sew it closed exactly as you did the rest of the casing. Optional: I also like to add a little stitching at the two side seams to ensure the elastic doesn't twist inside the waistband with wearing/washing. Work the fabric of the waistband around until the side seams of the skirt are equidistant (i.e. when you press the skirt down flat on a table, unstretched, the side seams should align with the outside folded edges of the unstretched elastic), then pin right through the elastic at the side seams. At both sides, sew a short seam on top of the existing side seams, right across the elastic, and tie off the ends on the inside of the skirt.
skirtTutorial_step11

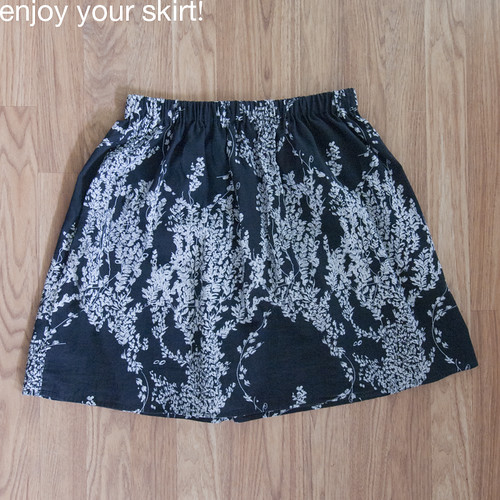
Enjoy your new skirt! You can see how I wore mine here. If you have any questions, let me know in the comments and I'll do my best to help - this is my first attempt at writing a sewing tutorial, and I am sure there are lots of ways I could make things clearer. And if any of you try this tutorial out, please feel free to email me - I'd love to share your handiwork here next week!

*This step is probably needlessly complicated, but I really hate measuring and came up with the paper guide system as a way to avoid doing it a second time. If this seems overly complicated to you, you can always skip it by opening up your first crease and essentially repeating the previous step, just adding the width of your elastic plus 1/4" to your measurement from Step 4 to create a new 'Crease B.' Be careful not to iron out the crease from Step 4 as you go, you'll need it again.

August 15, 2011

the essentials

2011_0814_blog01-web
2011_0814_blog04
2011_0814_blog05
2011_0814_blog03-web
2011_0814_blog06
2011_0814_blog07
2011_0814_blog02-web
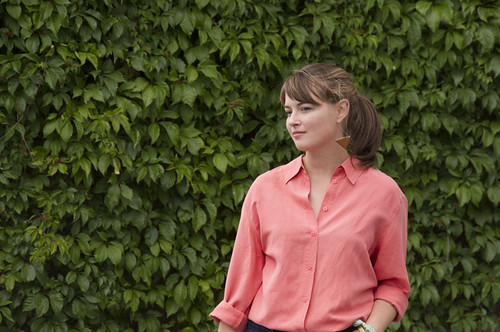
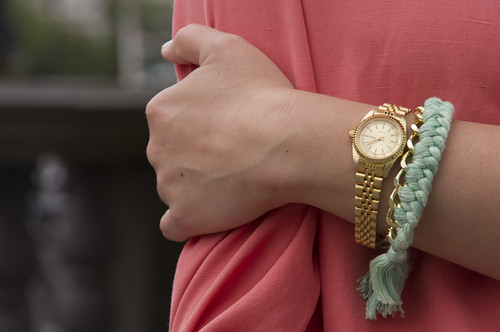
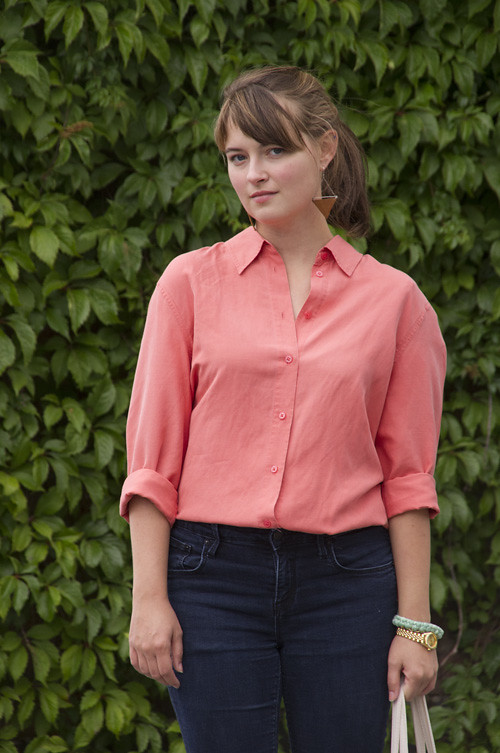
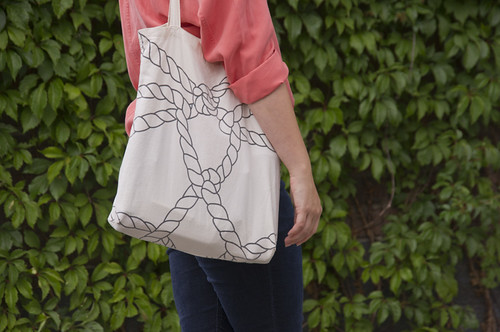
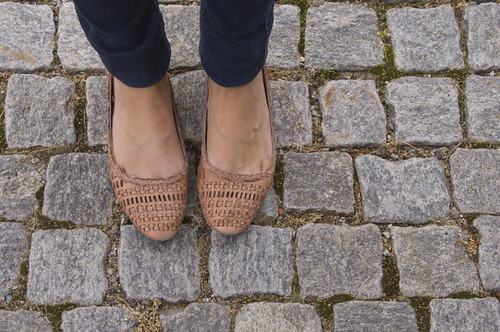
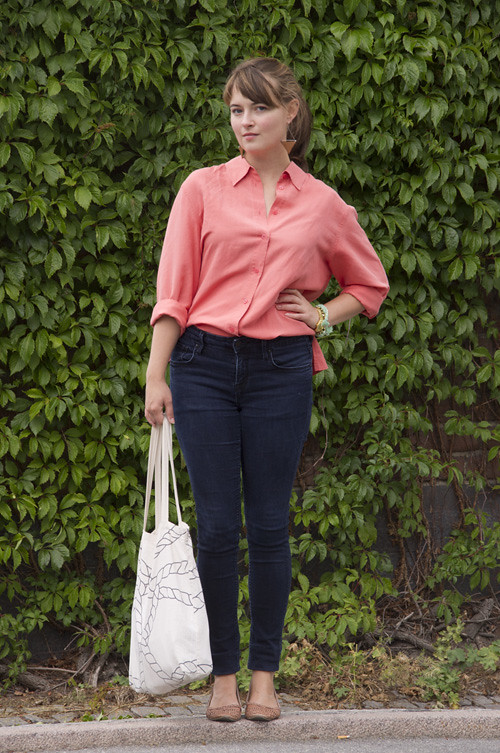
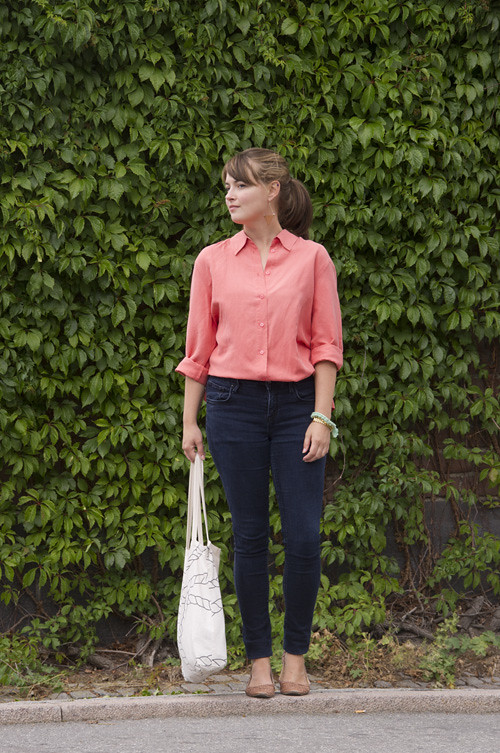
earrings - handmade by Carie of Pretty Little Mountains, won in giveaway / pink silk button-down - thrifted / tote - Forever 21 / watch - Arkanoplatz flea market, Berlin / braided chain bracelet - homemade using this tutorial / overdyed skinnies - Zara / woven flats - UO

From time to time I get emails from readers asking what they should pack for a trip, and I've always hesitated to be particularly specific in my replies. After eight months of living out of a suitcase, I have a pretty clear idea of what I like to pack for myself, but the trouble with my offering any kind of definitive packing list is that it will without a doubt fail to take into account all relevant factors. What do you like to wear the most? What time of year are you traveling, and to where? Will you be pounding the pavement in big cities? Lounging on a beach? Or hiking rugged trails? I can't tell you what to pack, because at this point I am only just beginning to get a handle on what I need while traveling - at this particular time and in this very particular set of places. Any travel brings with it an incredibly specific and idiosyncratic set of requirements, so to create a definitive and universally applicable packing list is an impossible task.

That said...

...here are a few things I think almost any traveler will find useful in their bag.  
These are my essentials.

1. A button-down shirt : As has been documented, I brought a lot of button-down shirts with me on this trip. Button-downs are infinitely versatile - they can be worn tucked in or untucked (or half-tucked), buttoned all the way to the collar or open, over a dress or top as a jacket, under another layer for a hint of color, tied up or belted. In nicer fabrics like silk (widely available at thrift stores), they can be worn casually or easily be dressed up should the occasion call for it. This oversized coral one is a blend of linen and silk which feels lovely and doesn't get too wrinkly in the suitcase - and cost me $2.98 secondhand.

2. A tote bag : Or, ideally, several tote bags, so that you can easily cart home your groceries (You weren't planning to eat out for every meal, were you? Eating in can make a huge difference in your traveling budget!). Not only is it good environmental karma to bring your own shopping bags, in many non-US countries bags are not free with your grocery purchases and must be paid for individually - not something you want to learn at the end of the checkout process! You'll also find lots of other uses for a lightweight bag while traveling - this one is packed with a water bottle, tupperware full of snacks (Pack lunches! Save your money for shoes!), a small notebook and pen, an extra grocery bag, and a scarf. However, please do not carry your wallet or passport in a bag like this - it is far too easy for pickpockets to just pluck your valuables out of the top in a crowded area with you none the wiser! Keep them in a securely zipped bag or money belt, or better yet, a safe or locked cabinet at home!

3. A watch : Or a cell phone, if you must, although beware of theft, and of potential roaming/data charges when you're far from home. You will be amazed at how often you will need to know the time while traveling - the time the metro stops running, the museum closes, your flight leaves, or that incredible bakery opens. With an eye towards safety, I'd recommend against anything too expensive or flashy. I wore a leather wrap watch from La Mer for the first part of our trip, and since then I picked up this 'gold' watch at a flea market in Berlin for €3.50.

4. Dark wash jeans : I feel like this staple hardly needs to be explained. Choose something comfortable enough for airplane rides - I like mine skinny with a lot of stretch. They'll go with everything in your suitcase, can probably go longer without laundering than you'd think, and the dark wash will allow you to dress them up or down as needed. I picked these up at a Zara in Barcelona and they've since become one of the most-worn items on my blog!

5. Flat shoes : I talked about the importance of your choice of shoes in this guest post over on sartoriography, but it cannot be stressed enough - you must. Bring. Flat. Shoes. If you are going to be doing any amount of walking or taking public transportation, you are going to want a pair of flat shoes that are truly comfortable. Comfortable means they should stand up to at least two hours of wandering/sightseeing at a time without pinching, rubbing, blistering, or making the balls and heels of your feet ache - at all. You will probably be on your feet a lot more while traveling than you are in your day-to-day routine, so soreness is to be expected, but your feet shouldn't feel ready to quit after only a few hours. Even if you're a devoted 'heels only' girl, try to give yourself a couple of flat options that you really like and will actually wear - personally I reach for these woven flats on a near-daily basis, and my brogues have proven a cute but practical option for rainy days.

I can't tell you how much use I've gotten out of all of these items over the last eight months, but I do know they've all more than earned their spot in my increasingly overstuffed suitcase. Do you all have any must-bring staples for traveling?

August 2, 2011

the perfect bun

pinned

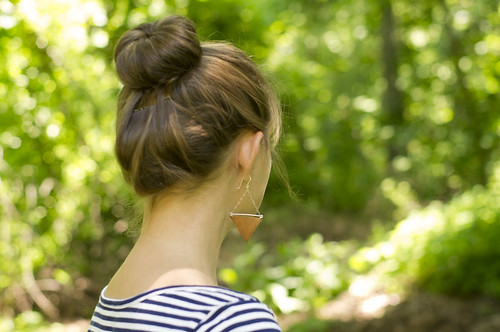
I've gotten a few requests lately for a tutorial on how I do my near-daily bun; long-time readers may remember a bun-tutorial video I posted some months ago (you can find it at the bottom of this post), but as I've picked up some new readers since then (yay! welcome!) and I've substantially changed my bun technique, I thought it would be worthwhile to just make a new tutorial. Enjoy!


The sock-bun technique works best with a sock that's the same color as your hair or a shade darker, as it will be harder to see in case you end up with any gaps. You can also rough up your ponytail a little first for a messier look, or if you want to make it extra fancy (and have longer hair) you could even wrap a small braid around the base of the bun.

April 15, 2011

milkmaid

braids
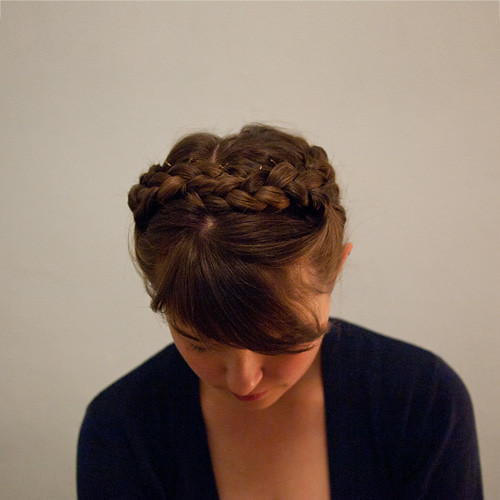
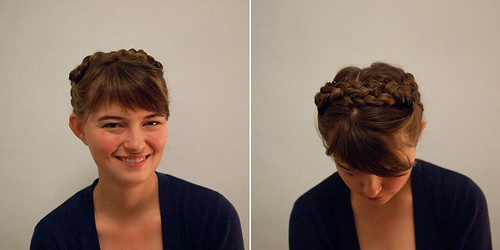
The finished product! Looks like my bobby-pin-concealment can still use work.

My hair isn't really long enough to put into milkmaid braids the normal way (as explained quite well over on Tick Tock Vintage), so I developed a little cheater method for shorter hair that still works pretty well and is easy once you get the hang of it. I considered making another video, but since there are a lot of (simple) steps, I figured I'd just keep things streamlined with a little photo-tutorial. Be warned - we took these photos indoors (ick, artificial light!), at about 8 in the morning (ick, undereye bags!), and I didn't realize until editing photos in the evening that the back didn't turn out very neatly this time. Oops! Anyway, although you'll look a little ridiculous during the process (see below), this is a great style for keeping your hair out of your face all day. All you'll need are four hair elastics (the clear kind are great if you've got them - I don't), a brush or comb, and a handful of bobby pins that more-or-less match your hair color (regular sized are fine, mini are better).

braids_01
Start with brushed hair, either clean or a bit dirty like mine. Insane bumpy waves from wearing it in a bun the day before are optional.

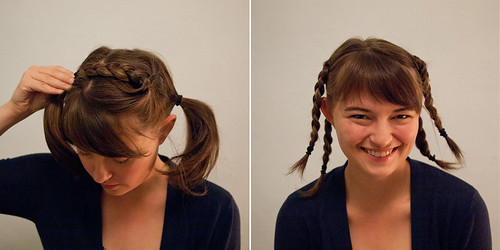
Part your hair in the center and put each side in a ponytail holder.

braids_02
One side at a time, divide each of your original two ponytails in half to make four smaller ones. You don't have to worry much about how straight the parts on the sides are, as you won't really see them, just try to end up with about the same amount of hair in all four. The two in front should be pretty high on your temples, and the two in back should be just behind your ears.

Take out the elastic and braid one of the front ponytails, tying it off as close to the ends as you can. I tend to tip my head way over to the side as I start braiding, to make sure I'm braiding directly away from my head. This makes the braids flip over more neatly at the end.

braids_03
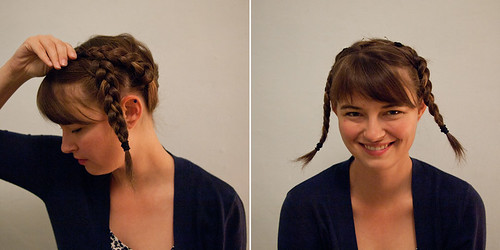
Try flipping your braid over the top of your head, making sure the braided part is long enough to cross over your center part. If it doesn't quite make it, undo it and start a fresh braid, repositioning the base a bit higher on your temple. It can take a couple of tries to find the right position. Once you do, braid the front ponytail on the other side at the same position on your temple.

Once your front braids are done, braid the two back ponytails the same way, starting just behind your ear. Once you've got all four braids, pause to allow your significant other to make fun of how silly you look. (This is still miles better than my passport photo.)

braids_04
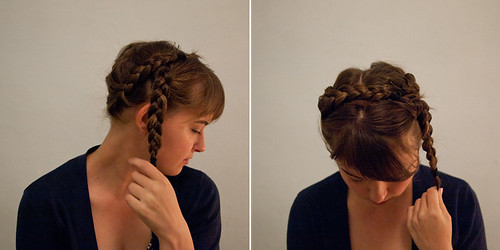
Gently pull one of the braids from the back towards the front of your head, keeping it above the base of the front braid. Pin the end of the braid to the top of your head with a couple of bobby pins, crisscrossing the pins to really secure it. Do the same with the back braid on the other side.

Once again, you are looking pretty awesome at this point. Pause so that others can admire.

braids_05
Now gently pull one of the front braids across the top of your head, covering over the ends from the back braid. Pin the ends in place, but don't put any pins close to the base of the braid just yet.

Pull the other front braid across in front, covering over the ends from the back braid and the other front braid. Tuck the end of the loose braid underneath the base end of the pinned front braid, then gently pin everything into place.

braids_06
Add extra bobby pins to secure any loose strands, and you're done! You can finish with a little hairspray to prevent flyaways, but I've found everything stays put pretty well without it. Feel free to leave questions in the comments, and I'll answer them next week!
//

March 11, 2011

freshly squeezed

Hi guys! Just a quick update for subscribers to my 'home' blog - I've got a few more new posts up on my tumblr!* There's a new outfit post (in which I nerd out about punctuation), a recap of my 30x30 remixes (including which outfits were my personal favorites), and my very first video post (in which I literally let my hair down - prepare for awkwardness).

I hate to bog down your RSS readers with a lot of Blogger posts linking to new Tumblr posts, so for the time being I'll only be updating the 'home' blog with links to my posts on Tumblr every few days or so. However, I have just started using Twitter, so if you'd like more frequent updates (or just to get a little extra glimpse into the day-to-day realities of my traveling lifestyle), you can follow my tweets @the_other_emily.
___________________________________________________________________________

EDIT: In the interests of maintaining a reasonably contiguous blog archive, I have amended my posts from Tumblr below - you can now read them here, or in their original home (with all the original comments) on Tumblr (click to read inventory, collared, & hot air). Enjoy!
___________________________________________________________________________

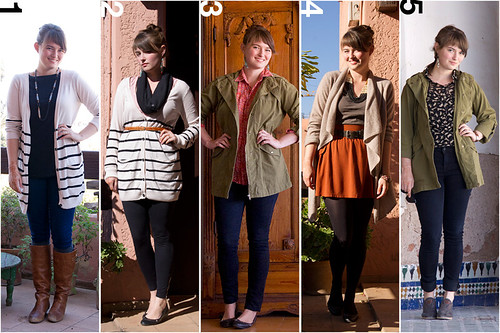
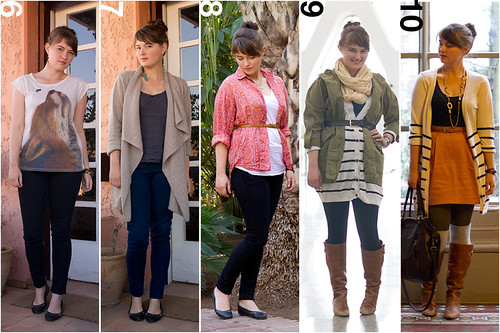
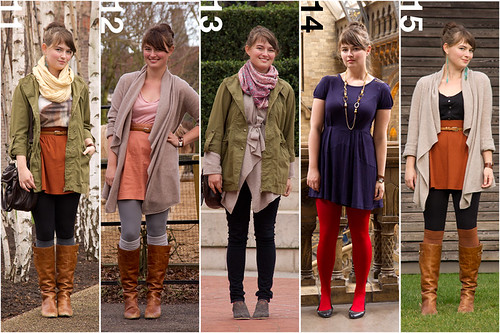
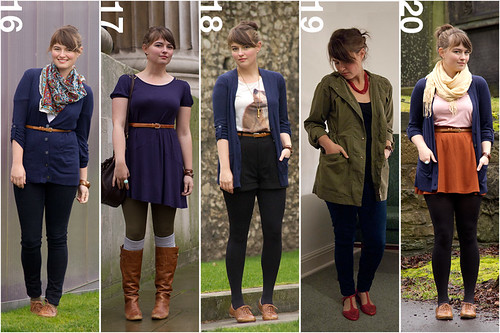
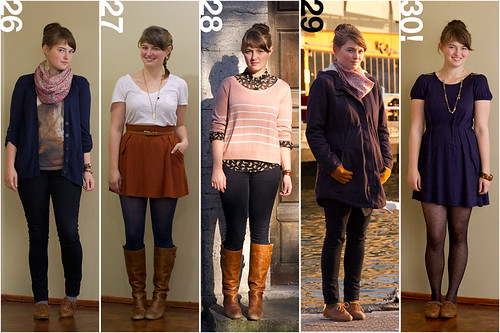
3.9.11 INVENTORY30 for 30: 1 through 5 30 for 30: 6 through 10 30 for 30: 11 through 15 30 for 30: 16 through 20 30 for 30: 21 through 25 30 for 30: 26 through 30
Thirty outfits, twenty-six garments (five t-shirts, five pairs of shoes, four sweaters, three pairs of pants, three tanks, two skirts, two blouses, and one dress), four countries, two continents,* and one suitcase. Whew.

While I suspect that my post-remix experience will be a little anti-climactic (after all, I only have about five garments that weren't included in my picks to remix), I am still glad to have finished. Things didn't go exactly as I'd planned (namely, seven of my original picks getting hung up in customs), but I feel like I still managed to embrace the spirit of the challenge and get a lot out of my limited wardrobe in the process. I wore a few outfits that probably wouldn't have occurred to me otherwise (particularly #8 and #25), came up with a few combinations that I will definitely be going back to again, and remix #11 just made it onto the 'featured' page at Weardrobe, which is pretty cool. My most worn items were, unsurprisingly, my overdyed skinnies (12 times!) and my boots (10), and my least worn were my red t-strap sandals (1), which were an admittedly unseasonable late addition.

Looking back, I think my favorite outfits are #4, #12, #13, and #24 - which is your favorite?

*Dang, should have taken one of my Istanbul photos on the Asian side of the city - I could have scored another continent!
___________________________________________________________________________

3.10.11 COLLARED
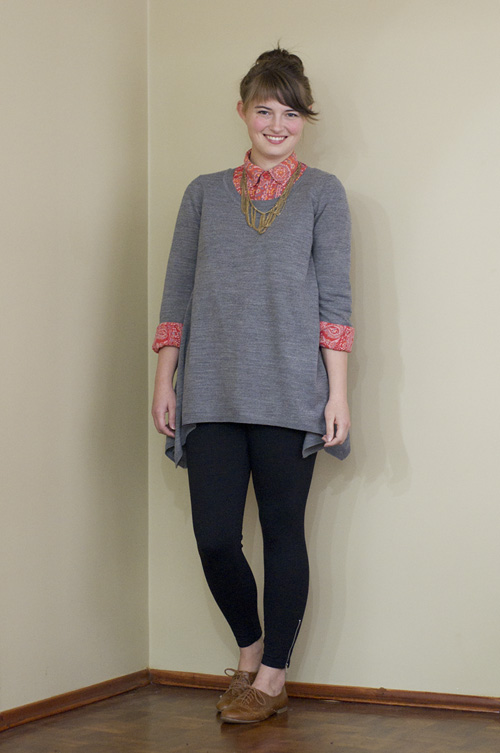
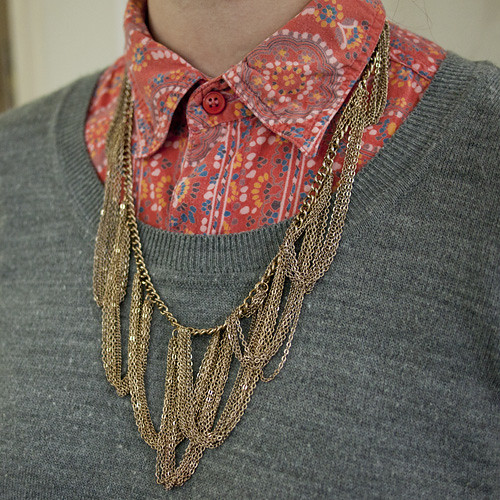
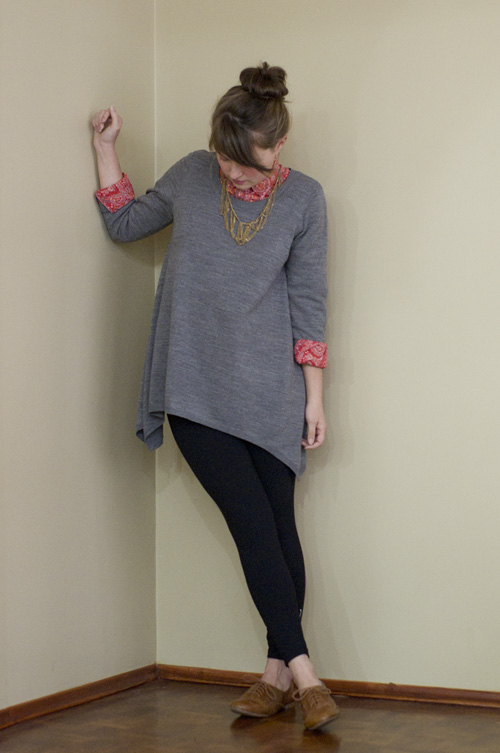
Fatma Sultan Cami Sk., Istanbul: 10 Mart fancy collar zee brogues Fatma Sultan Cami Sk., Istanbul: 10 Mart
gold chain necklace - Forever 21 / red print button-down - vintage, thrifted / gray sweater - H&M / ankle-zip leggings - mommed, Style&Co / brogues - Primark

Today I started easing back into the rest of my 'closet' slowly, one piece at a time, since I feel like I've got to stretch out the reunion as long as possible. It seems to be working for me so far, as this is one of my favorite recent outfits. The leggings and sweater had me feeling like I was in pajamas all day, but the high-buttoned collar and brogues kept things a bit more pulled together. A few months ago I lamented that while I loved this shirt, it really wasn't very versatile; I must have found at least four new ways to wear it since then.*

We've decided to go ahead and make some pretty big, unexpected changes to our travel plans, so we spent our third (third!) snow day working out new logistics on that front. While we are sacrificing some things we'd really been looking forward to, I think our new plan is ultimately a change for the better.

I also made my very first video for the blog today! I've still got a little editing to do (and a little more confidence to drum up) before I post it, but I should have that up here tomorrow - and if nothing else, you guys can have the slightly uncanny experience of finally hearing my voice. (I did not, ahem, get around to those pesky taxes I was going to tackle today...)

Oh! And after some gentle prodding from a few blog friends, I finally got on Twitter. I am still getting the hang of it (like, what is the ettiquette for unsolicited 'tweeting' at somebody?), but if you're interested in wry cultural observations with an international slant - I'm thinking Jerry Seinfeld meets Carmen Sandiego (WHAT is the DEAL with NICARAGUA?) (Ok, I promise my tweets aren't quite that bad.) - you can follow me @the_other_emily.

*To let you in on just how much of a nerd I am, as soon as I finished writing that sentence I immediately googled the proper use of a semicolon; it turns out my usage is totally kosher. However, I cannot vouch similarly for the mixed punctuation in my last paragraph.
___________________________________________________________________________

3.11.11 HOT AIR
Here it is, my very first video post! I've been asked a few times (on the blog and IRL) how I do my hair in my now-almost-daily bun, so I put together a little tutorial video yesterday afternoon. I am always fascinated when bloggers I've been reading for a while post videos - somehow I am always surprised by their speaking voices and mannerisms, and I imagine some of my readers will have that same uncanny experience with this one (e.g., did anyone expect me to talk with my hands quite so much?).


You could call this the 'no-twist' bun (which gets extra cool points for doubling as a reference to one of my favorite bands), but I always think of it as my 'hot air bun,' since its volume is about 80% empty space. It works well with shorter/medium length hair, and could probably work with longer hair with a little trial-and-error. My bun wound up a good deal sloppier than usual in this video, but if you give it a few tries in front of a mirror, you should be able to make it as neat or messy as you'd like.

This is also the very first time I've worn my hair down on the blog. I've been growing out a pretty serious pixie cut for about a year and a half now, and since I haven't had a cut in all that time, it is a pretty awkward mix of lengths at this point. I'm hoping to get a real haircut sometime in the next few months, I'm just waiting for the front to get a little bit longer.

On a substantially more serious note, my thoughts and sympathies are with all those affected by the earthquake and resultant tsunamis in Japan. I am incredibly fortunate to know that my friends there are safe and far from harm's way, but there are still untold numbers of injured and displaced civilians in danger. I encourage everyone looking for a way to help those affected by the disaster to consider making donations through the American Red Cross - you can donate directly to the relief effort here.
//